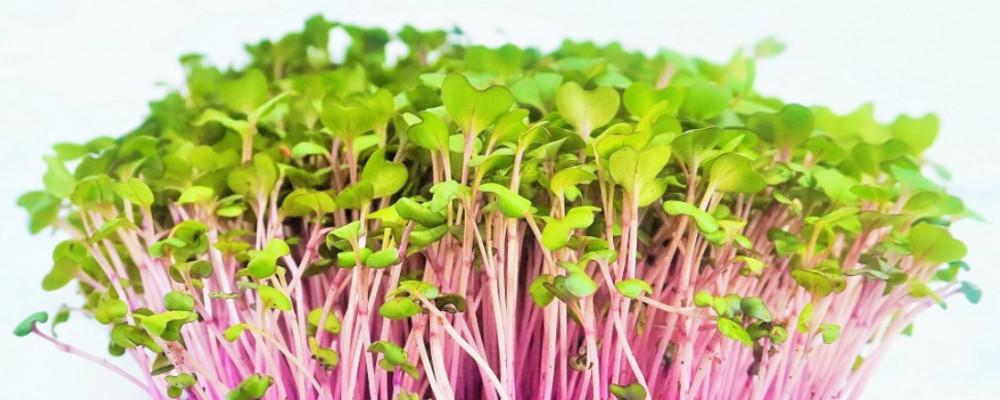
What are Micro- Greens?
The young seedlings of edible vegetables and herbs are known as micro-greens. Microgreens can be harvested and consumed a week to ten days after the leaves have formed, unlike larger herbs and vegetables that take weeks or months to produce.
These miniature versions barely reach a few inches in length and are available in 50 to 60 various kinds.
Due to their increased expense, micro-greens were once only found on fine dinner plates and in boutique grocery stores.
Now they are making their way to the normal dinner plate for a variety of reasons.
Reasons for Micro-greens popularity.
Microgreens are tiny, nutrient-dense greens that may be grown in a small amount of space and in a short amount of time, even on a windowsill or in your kitchen. In other words, they are easy to grow, healthy, and can be moved around freely with little risk of upsetting their growing patterns.
Thanks to their high nutritional value and the range of species that may be grown they have become very popular during the Covid pandemic. They are seen as little super-warriors in the war against Covid.
Some Downsides.
Growers need fresh soil, seed, and a sterilized container or growing mat after each harvest to continue the growing process.
When compared to mature herbs and vegetables that grow back after being chopped or clipped, these seemingly small costs ( Fresh soil, sterilized containers, and growing mats) can add up quickly. However, the bursts of flavor and delicate aesthetics quickly negate the small outlay of funds,
Because of the short time between harvests, you may feel you are doing a lot of work for minimal return. Your culinary ROI may initially slow your enthusiasm, however in my opinion it is well worth the effort.
Start Growing Microgreens at Home
Microgreens production for home use does not need the use of any special tools, and you should be able to get everything you need at home or at any gardening or hardware store, aside from the seeds. If you plan to cultivate micro-greens on a regular basis, you might want to invest in some smaller and shallower growing trays and small tools.
You’ll need the following items to get started:
Most items you will find lying around the house or in your tool shed.
- Seeds
- Drinking water.
- Growing medium or mat.
- Growing containers or trays.
- A small kitchen scale or measuring cups.
- A spray bottle and a water jug.
- A pair of scissors or a sharp knife
Some of the more popular micro-greens and seeds are;
Mustard greens Radish greens
Watercress Peas
Cabbage Basil.
Kale Arugula
Spinach
What Next?
Choose a Location
- Clear the place where you’ll be growing your micro-greens and make sure the surface is covered from water spills.
- Prepare your growing trays.
- If you’re re-using an old tray, make sure it’s disinfected and dried. Fill trays with an inch or two of moist soil or potting mix and level by dragging or pressing something like cardboard across the soil surface.
- Seeds should be prepared and sown.
- Before sowing, soak the seeds overnight or for a few hours. Spread the seeds evenly on the surface and cover them with a small amount of soil or potting mix.
You Don’t need anything as deep as this but use what is handy rather than going out to buy anything.
Plant your seeds.
Pressing your seeds into the soil increases germination and growth by establishing good soil contact and allowing them to absorb more moisture. It is feasible to stack trays of the same size on top of one another to apply uniform pressure across the entire soil surface. This should result in them sprouting at similar times.
Cover and Wait.
Because many seeds do not require light to germinate, only moisture, some gardeners will cover trays with plastic bags or wrap at the start of the process to aid germination.
Water when Needed
Keep in mind that the key is to keep the seeds damp but not wet until they germinate. Spraying once or twice a day after the seeds have sprouted is suggested.
Harvesting
Once the leaves begin to sprout, the micro-greens should be ready to harvest in 10 days to 2 weeks. Snip the micro-greens slightly above the soil with scissors. Because micro-greens do not regenerate after being harvested, you will need new seeds and soil to grow more.
Recipes
To get the most nutrition and freshness out of micro-greens, consume them uncooked. Cooking is not recommended since they have a large water volume that makes them unsuitable for this sort of food preparation. Keep it simple and keep it flavorful.
Microgreens salad
When it comes to recipes, salad is always the first thing that springs to mind. Choose your favorite greens, such as hearty kale, spicy arugula, or zesty mustard greens.
Even better, combine several varieties of micro-greens and enjoy them as a quick extremely healthy salad…
Who Am I?
My name is Stephen and I am, unashamedly, a gardening junkie. I love the feel of soil running through my fingers, and the pleasure of eating a BBQ outside is one of my lifes greatest joys. Add to that a bowl of micro-green salad and this is paradise.

This is what we build for ourselves and our children, in the hope that we are making positive changes for their and our futures.


